Video Tutorial – Add a New Project
1. Add a New Project from the Projects Dashboard
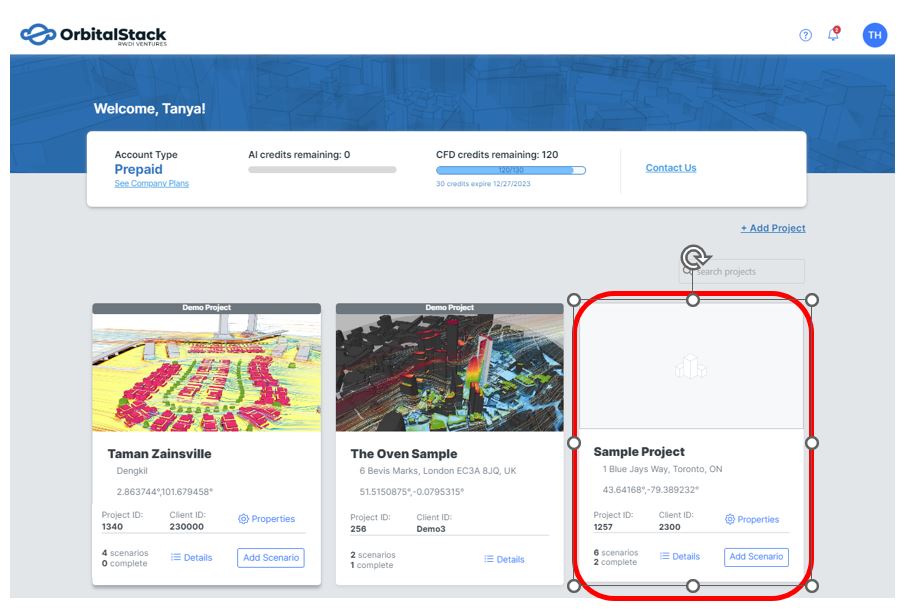
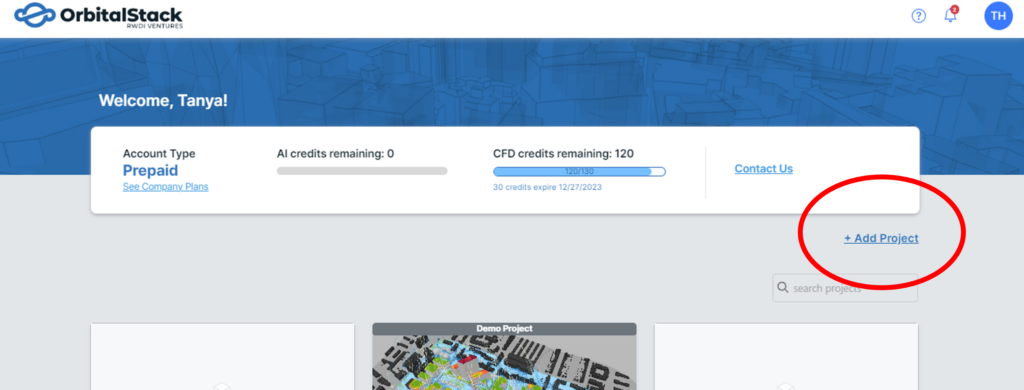
On the Projects Dashboard, navigate to the top right of the screen and click +Add Project.
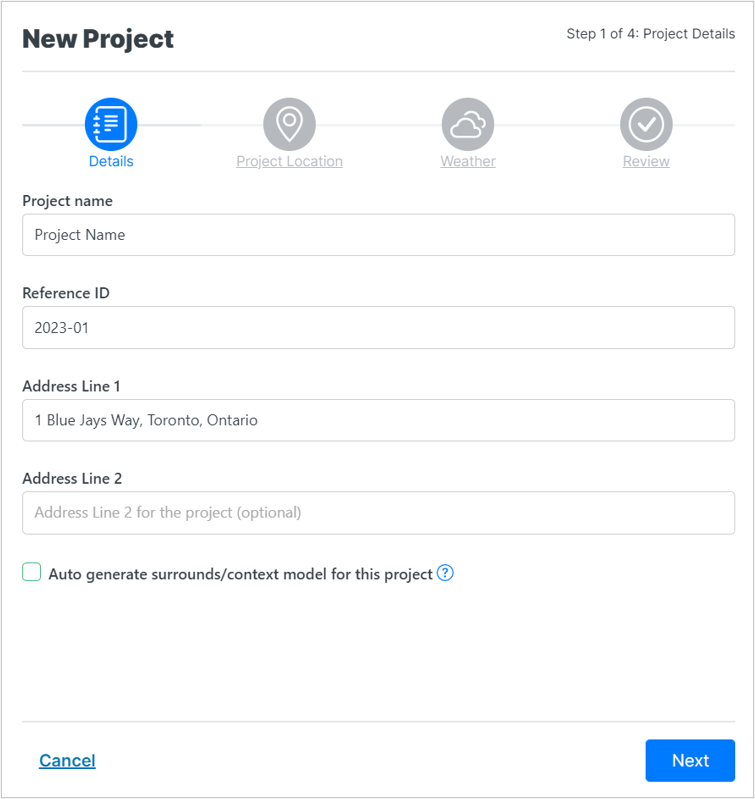
2. Project Details
A pop-up window will appear for your new project. Fill out the information as follows:
- Name (required): the name of the project that appears on the project tile
- Reference ID (optional): your internal project ID that you might use to track billing or other activities at a later point in time
- Address 1 (required): the address of your project
- Address 2 (optional): extra room for address details (e.g. Unit #)
- Auto generate surrounds/context model for this project : A context model will be generated using Open Street Map data. Learn more here.
3. Selecting your Project Location
Next, you will be prompted to selected your project location.
The map is initially centered around the location from the address you entered in the previous step. Please click on your specific project site location on the map to drop your pin. If your address appears to be off significantly try re-typing your address in the search bar or manually updating the latitude and longitude.
It’s important to note that your project location cannot be changed after the creation of the project.
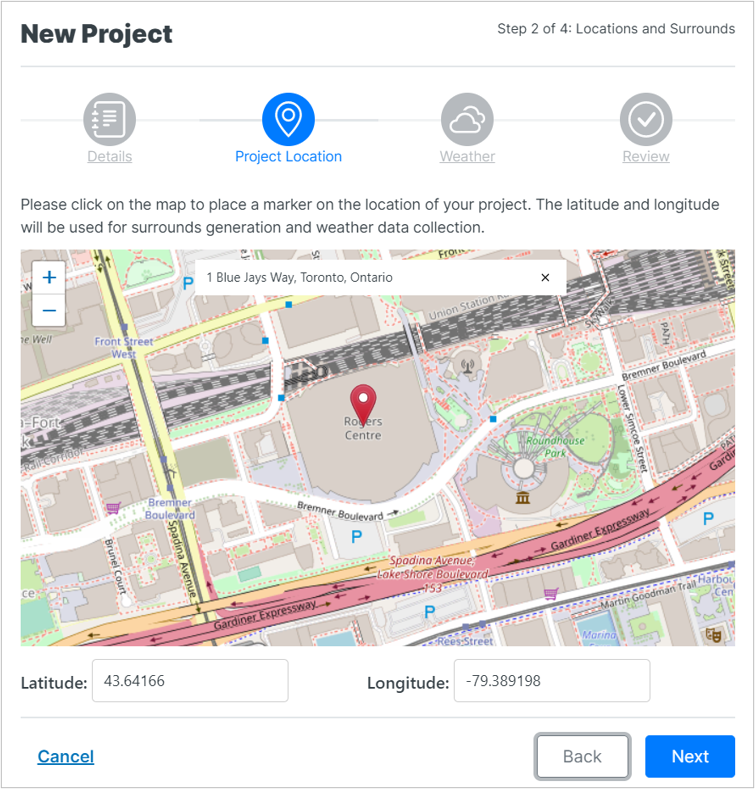
*Note: Specify the coordinates in decimal degrees to three decimal points for accuracy and include the Negative (-) values for projects in the Western and Southern hemispheres, respectively.
4. Selecting your Weather Source
You are now prompted to select your weather source:
i. Measured Data: Measured data provides the most accurate meteorological scaling of simulation results and is the preferred option when there is a good quality weather station within 100kms of your project site. Airport weather stations typically provide the highest quality data.
Selecting this option will provide you with a list of weather stations to choose from. They are ranked in order of Airports first and then are based on distance from your project site.
ii. Modelled Data: While measured weather data is generally preferred, this option should be used when there is not a good source of measured data near your project site. Select this option if there are no stations within 100km of your site or the nearby stations are known to have inferior quality.
iii. Custom Data: This option is available to monthly subscribers and can be used in AI and CFD simulations. Custom weather data files are uploaded as .csv with TC360 formatting. For further guidance, refer to our post on Uploading Custom MET Data.
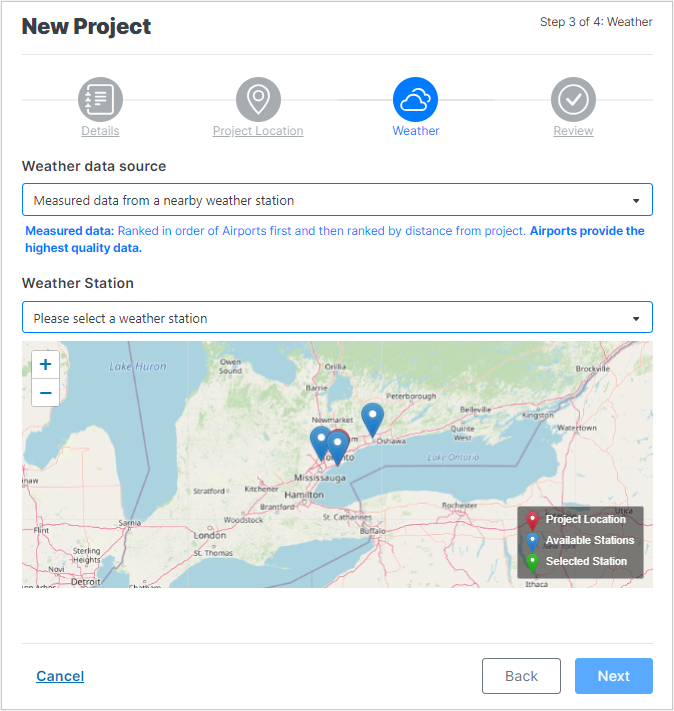
IMPORTANT: For an in-depth understanding of why choosing the most suitable weather station is crucial, please refer to our article on Weather Station Selection.
5. Review
You will then be asked to review and confirm what you have entered.
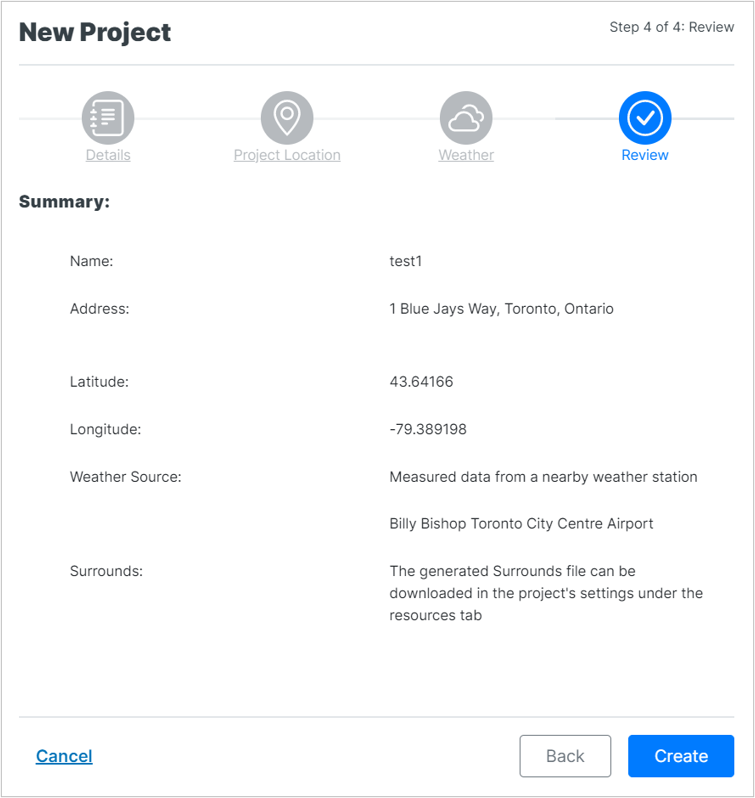
Once you are satisfied, click “Create“. Your project will then appear on your Project Dashboard: