
This guide explains how to view and/or manage your subscriptions, user permissions, and share groups through the Company Administration page.
Getting Started
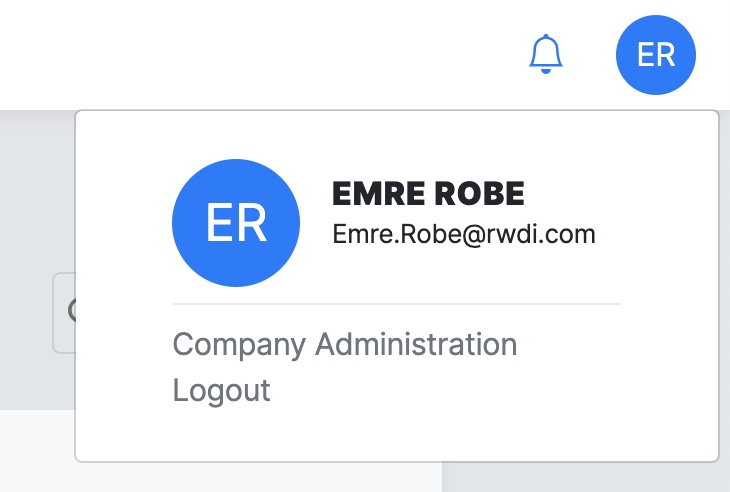
On your Projects home page, navigate to the top right corner of the screen and click “Company Administration”.
Subscriptions and Usage Management
Orbital Stack manages usage via a credit (or token) system. There are two types of credits: AI Credits and CFD Credits. AI simulations use one AI-Credit per wind direction (e.g. 8 credits for a typical 8 wind direction simulation). CFD simulations use 7 CFD-Credits for a Wind Only Analysis and 10-14 CFD-Credits for a full analysis which includes wind, solar and thermal comfort (2-4 Seasons).
Please refer to our pricing page for a complete list of Bundles, Subscriptions and Pay-Per-Use options.

Bundles
Bundles can be purchased at any time, and are ideal for testing new design ideas, supporting project competitions, and for larger projects with multiple design iterations and stages. Custom bundles can be made available upon request.
Subscriptions
Subscription plans refill every month until the plan has expired. The “Monthly” column shows the list of active subscriptions you currently have, as well as the usage to date during the month, and the day of the month when credits are refilled (monthly roll over).
Pay-per-Use
Pay-Per-Use credits are available for one-off simulations or in addition to our bundles and subscription packages.
Note: To purchase or modify a bundle or subscription plan, or to enable Pay-Per-Use billing, please contact us at sales@orbitalstack.com
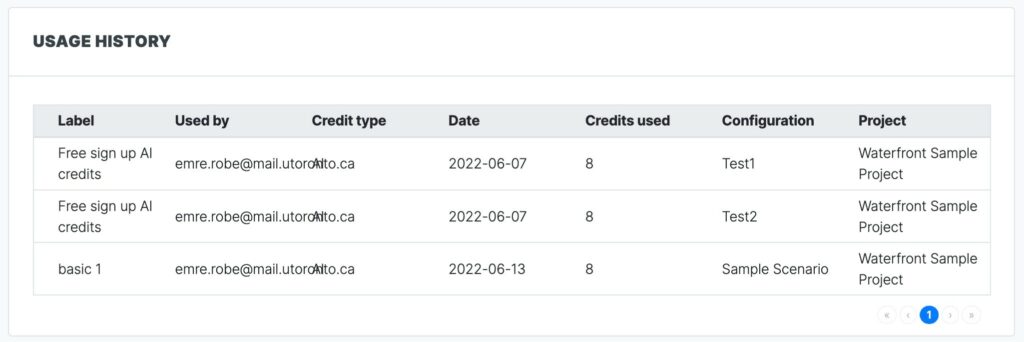
Usage History
Each time a user in your company submits a scenario, the transaction will appear under the “Usage History” table. Each entry indicates the:
- Label – The subscription plan used
- Used by – The user who submitted a scenario
- Credit type – AI or CFD
- Date – When the scenario was submitted
- Credits used – # of credits used for each scenario
- Configuration – Name of the scenario
- Project – Name of the project
Permissions Management
Access to various features within Orbital Stack is controlled by User Roles under User Management and Share Groups under Share Group Management.
User Management
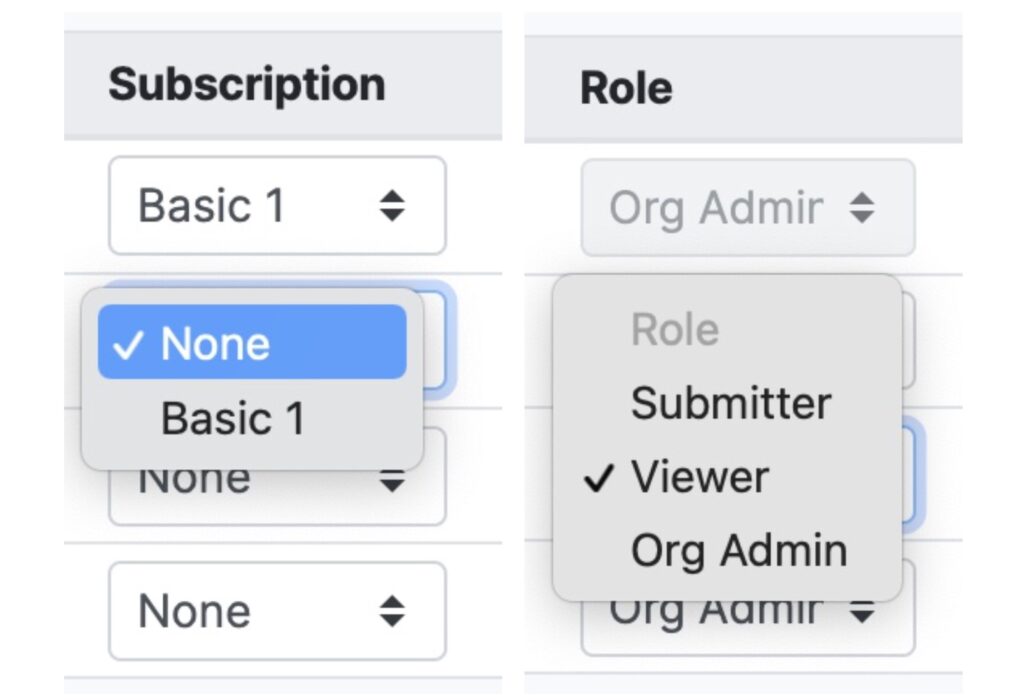
In the User Management table, the Organization Administrator can change or assign roles and subscriptions to the users within the organization. Each role comes with the following permissions:
- Viewer: Can only view completed scenarios
- Submitter: Can view and submit scenarios with a subscription plan (can submit using Pay-per-Use credits if no subscription assigned)
- Org. Admin: Can assign roles, subscriptions to users via the Company Admin page. Can also view and submit scenarios
To add a new user to your company, click “Add User“. Enter the user’s full name and their email address, select their intended role, then create a password for them*.

*Note: Upon signing in, the user will be able to set a new password for themselves by clicking the “Forgot your password?” link on the sign-in page.
To remove a user from your company, simply click the Trash icon next to their username.
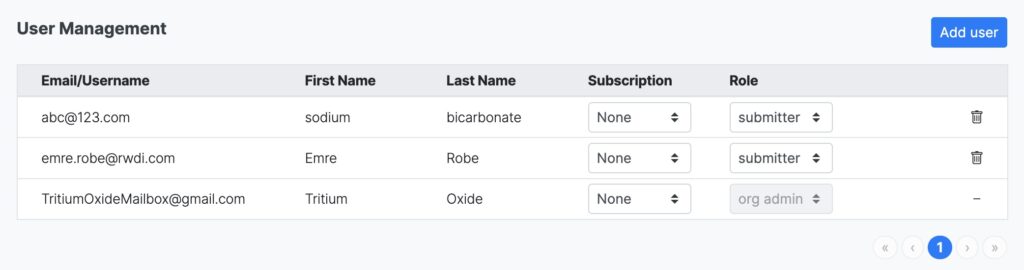
You may also assign a new role or subscription to an existing user by making selections from the dropdown menus:
Share Group Management
Share Groups are a convenient way to share projects with a specific group of people within your company. An “Everyone” Share Group with all users in your company is created automatically.
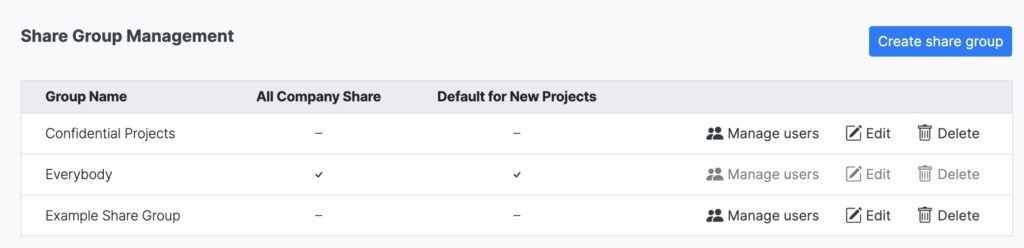
To add a new Share Group, navigate to the Share Group Management section and click “Create Share Group”. Choose a name for the share group, then click “Add Share Group”.

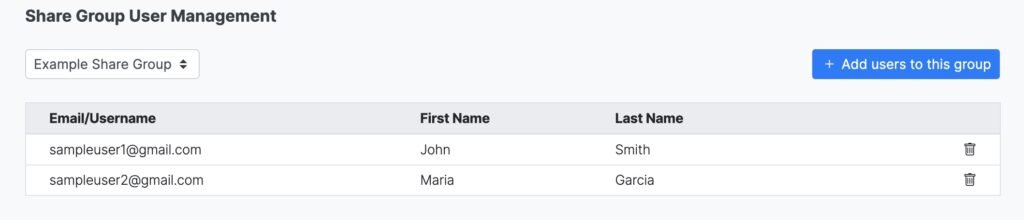
To add and/or remove users from a Share Group, click “Manage Users”. From here, you may search and Add / Remove any users in the organization.
Projects can be shared with a Share Group via the Project Properties page. For more information, click here.
Please do not hesitate to Contact Us with any questions!