First submission: Contact us to get started
Don’t see these buttons?
If you would like to run your own simulations, but do not have access to the Add Project/ Add Scenario buttons described in this section, contact your Orbital Stack representative or email us at support@orbitalstack.com.
How to Prepare your Files for Upload
Please prepare all geometry as a set of STL files
- With north oriented to y+
- With a scale of 1:1 in meters
Prepare your “Model” as three distinct STL files
- Study building
- Context (or surrounds) –between 250m and 300m radius
- Ground plane –unless there are significant grade changes, flat is best
- Make sure there are no large ‘holes’ –it does not have to be watertight
- Porous elements – eg Trees, screens etc.
Create a “Study Surface” STL file
- These are the surfaces where you want to see results, like:
- The ground surface of interest
- Accessible amenity spaces, podiums, and rooftops
- Other important elevated surfaces (generally, only areas wider than 3m or larger than 15m2)
- We will shift them up by 1.5m to achieve the correct results
Please check your files are all aligned by loading them into a viewer together. Review Preparing Geometry for more detailed information.
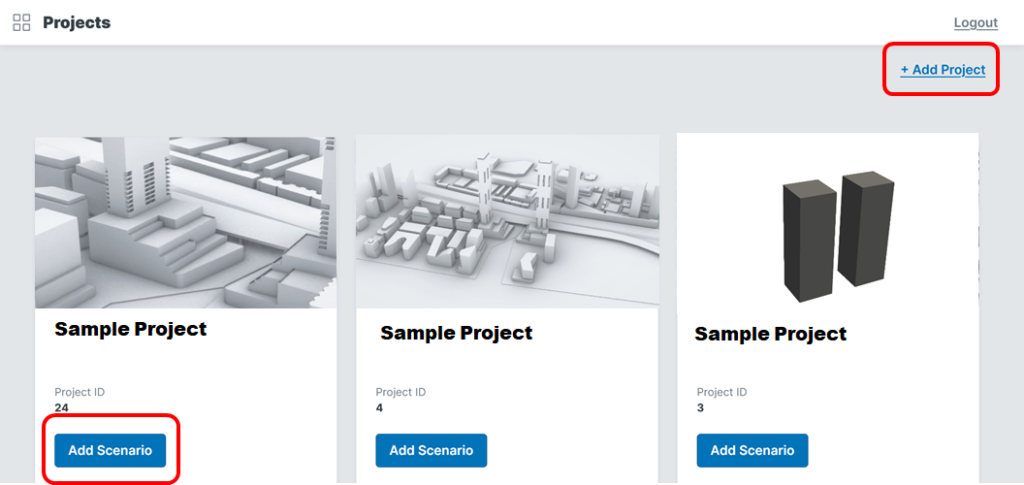
Create a New Project
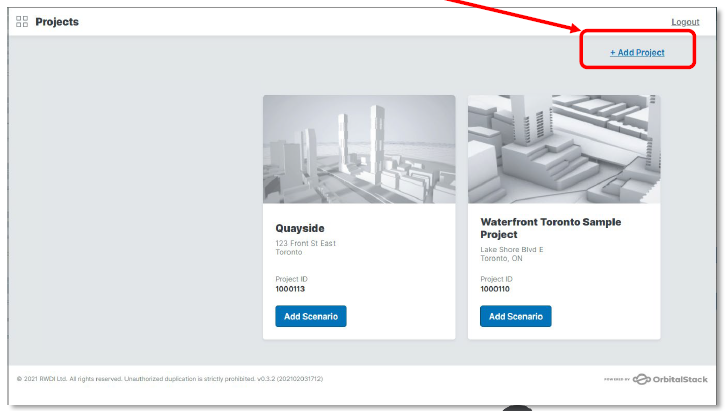
If you are submitting a new building or development, you will need to Add Project first and then Add Scenario to request a simulation.
From the main project list, select ‘+Add Project’.
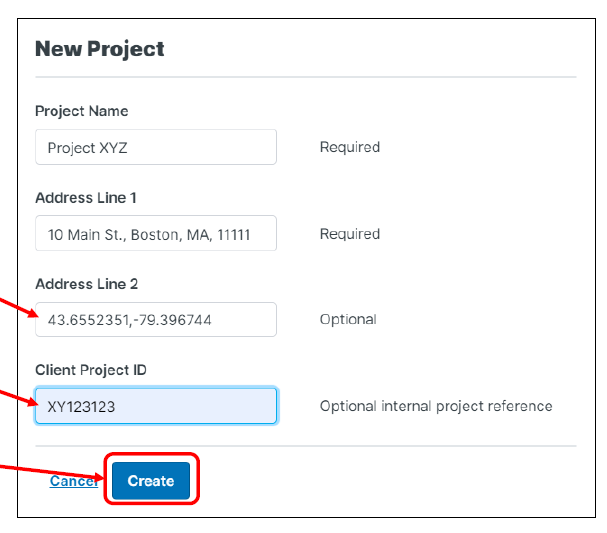
Creating the New Project
- A dialog box will appear to capture basic project details.
- Complete the form.
- Accurate and complete address information is critical for us to place your project. Ideally, provide latitude and longitude coordinates of the origin of your model – this will help ensure we provide the most localized weather data
- ‘Client Project ID is an optional field to record an internal project number that you use to track the project.
- Once complete, click ‘Create’
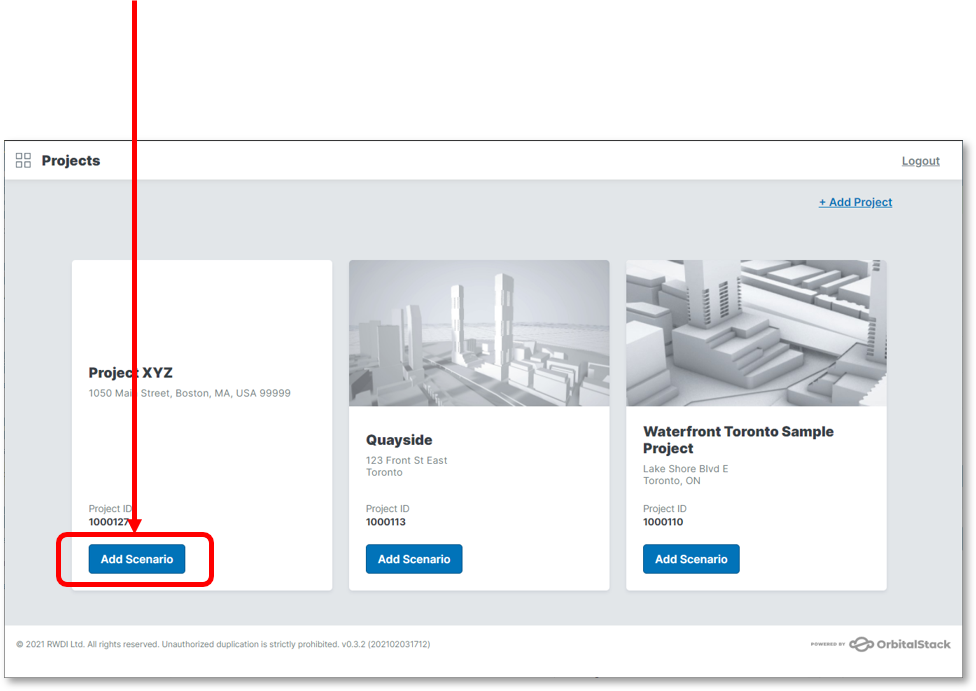
Add a Scenario (new simulation) to an Existing project
Find the project you would like to add the scenario for in your list of projects and click ‘Add Scenario’
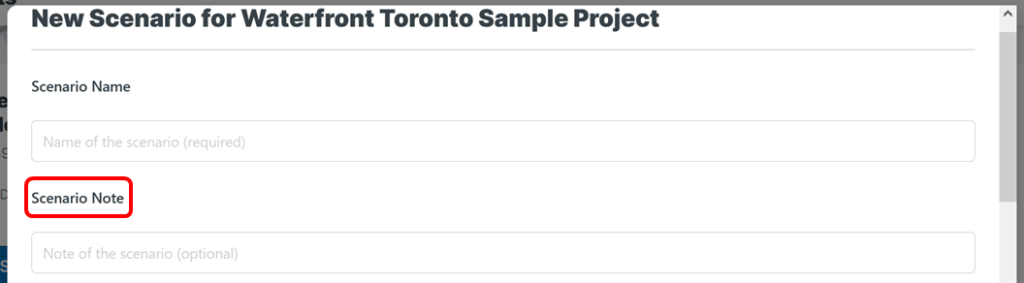
Fill in the fields on the form.
Use the ‘Scenario Notes’ field to provide details and any special instructions (see Add Scenario Notes Section below)
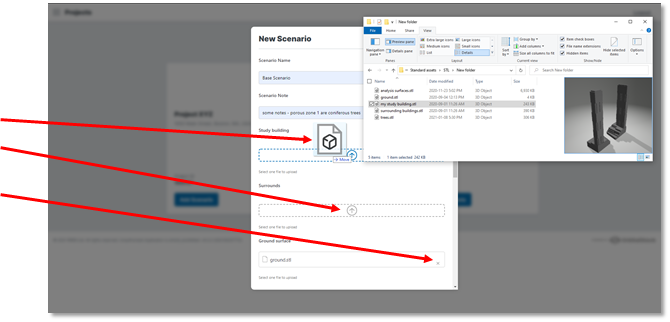
Add files to the scenario via drag-drop
or by clicking the field and browsing for the file (Mistaken files can be cleared with the ‘x’.)
At minimum, an STL file is required for each of the following:
- Study Building.stl
- Surrounds.stl
- Ground Surface.stl
- Presentation Plane.stl
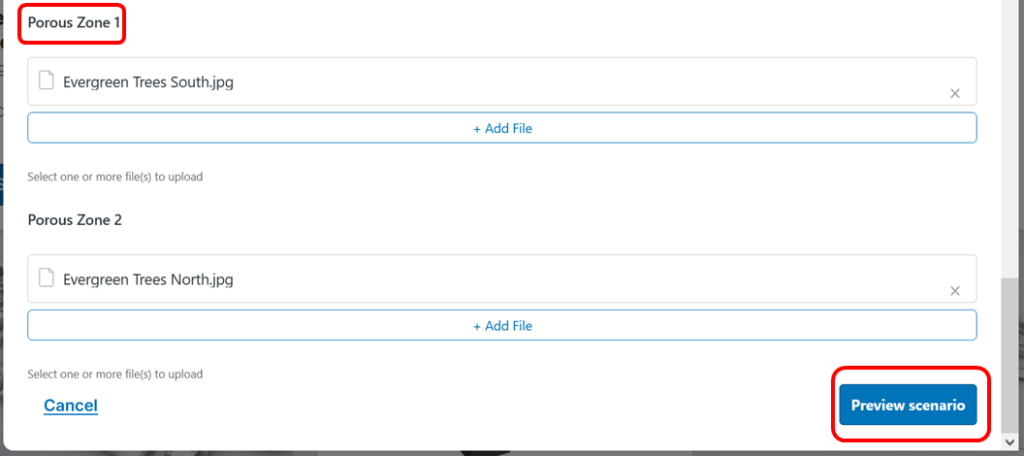
You can add Porous features such as trees (indicate if evergreen or deciduous)
When ready, click ‘Preview Scenario’.
Add Scenario Notes
Please provide the following information in Scenario Notes:
Specify which Analysis Types you’d like to see:
Option 1: Wind Only (this is a 6-wind direction simulation).
Option 2: Full (Wind, Thermal Comfort and Solar Shading)
Specify the Simulation Parameters:
With each simulation we slice the data in 2 seasons, and 3 time of day periods. It will be up to you to decide which parameters best tell the story you are trying to tell.
Option 1: Tell us a profile (extremes, averages or shoulder seasons). Example: Averages
Option 2: Pick from the set of predetermined list. Example: Season: Summer, Autumn; Time: Midday Focused, Afternoon Focused, Evening Extended
| Temperate Climates | Season for Tropical Climates | Default Time Periods |
|---|---|---|
| Summer (June – September) | Wet (user specified) | Morning Focused (6am – 9am) |
| Summer Long (May – October) | Dry (user specified) | Morning Extended (6am – 11am) |
| Autumn (October – November) | Midday Focused (11am – 2pm) | |
| Winter (December – March) | Midday Extended (10am – 3pm) | |
| Winter Long (November – April) | Afternoon Focused (3pm – 6pm) | |
| Spring (April – May) | Afternoon Extended (2pm – 6pm) | |
| Evening Focused (6pm – 9pm) | ||
| Evening Extended (6pm – 11pm) |
Option 3: Completely Custom.
Example 1 – Season: Wet (November – March), Dry (May – July); Time: Morning (5am-8am), Midday (10am-2pm), Evening (6pm-10pm).
Example 2 – Season: Autumn (Sept-Nov), Winter (Dec-Jan); Time: Morning (5am-10am), Midday (10am-4pm), Afternoon (4pm-10pm)
Weather data
By default, we will pick the best climate data, will characterize the urban landscape, pick the seasonal breakdown that best suites the climate, and pick time of day bins. Or you can provide your own weather datasets.
Comments
Specify any important comments about the project, geometry, or scenario
Porosity
Specify the desired porosity for each of the porous elements being submitted (if any) – on a scale from 0 to 100% (0% being solid and 100% being fully open)
Preview Scenario and Submit
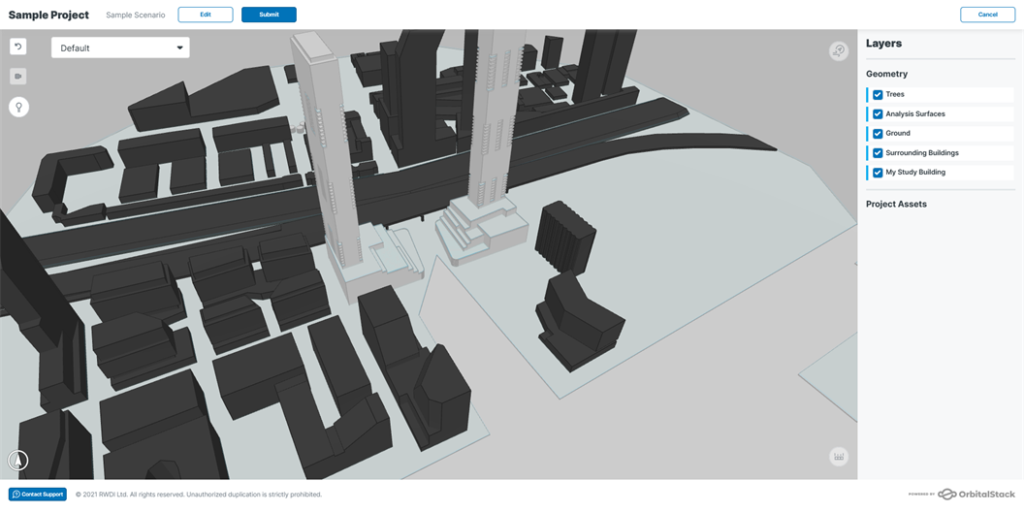
After clicking Preview Scenario, you will be placed in the 3D viewer to review the model that was just uploaded.
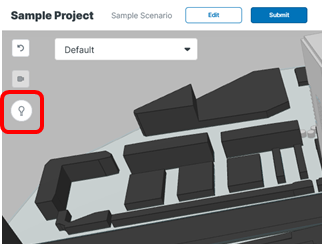
Spin and rotate the model and toggle the model components off and on to make sure everything aligns as expected (Click the lightbulb icon for tips on how to spin, rotate and toggle).
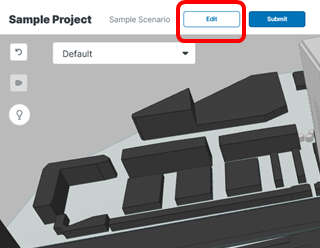
If something is incorrect, click Edit to change the submitted files.

If you are ready yo run the simulation, click Submit.
To discard your submission, click Cancel.
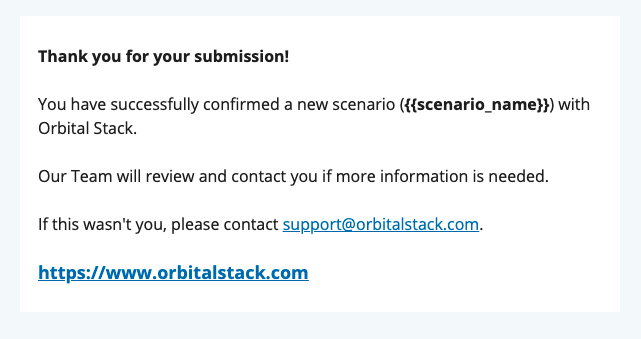
Receive Email Confirmation
After you hit submit, an email confirmation will be automatically sent to you and our team. You should receive your results within 48 hours or we may contact you if further information is needed.